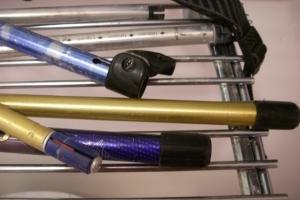
Drying Trekking PolesAt the end of a day on the hill it is really important to dry things out properly. This includes trekking poles.
Make sure you take the poles apart and dry the joints. If you don't take them apart to dry them they will soon seize up and you will not be able to adjust their length. This is especially the case with 'twist lock' adjustable poles. Personally I like to use the 'flick lock' system that you find on some poles as these don't seem to seize up as much.
|
|
|
|---|
|
Repairing Outdoor Equipment
The cost of outdoor kit is never cheap and at this time of economic recession it is a great time to think about repairing old kit rather than replacing it with new stuff.
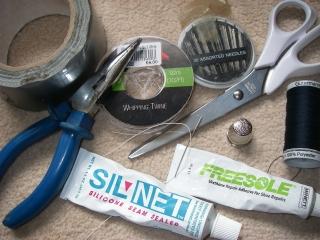
Here I will look at simple and effective ways to repair kit like rucsacs and waterproofs. A good repair kit for this job should contain: needles (thicker are stronger and with a large eye for thick strong thread), thread (use 100% polyester rather than cotton as it doesn't rot), whipping twine (this can be sourced from a boat chandlers and is really good for heavy duty repairs), gaffer tape (sometimes called Duck or Duct tape), pliers, scissors, thimble, urethane and silicone repair sealant.
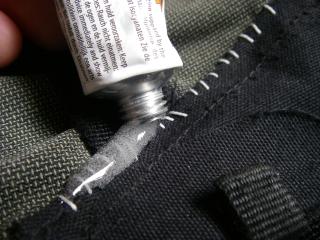
If the repair is a small hole in a waterproof then turn it inside out and place gaffer tape neatly over the hole. This is best done in a warm environment so that the adhesive sticks better. If it is cold then carefully heat the adhesive side with a lighter to make it more sticky. Cutting off the corners of the tape also helps it stay stuck. Then on the outside put a small blob of urethane sealant and smooth out with a wet finger. I find that the silicone sealant gives a more flexible repair but rubs off pretty quickly too. The urethane is much more hardwearing and will keep the water out.
If you have a larger tear in your clothes stitch it up with ployester thread and then put the urethane on the outside over the thread. Urethane or gaffer tape can be used on the inside. If your rip is in your rucsac or the stitching is falling apart then using whipping twine will give a much stronger repair. Using a thimble for getting through many layers is useful and if that doesn't work then a pair of pliers helps to pull the needle through the material. I use urethane on the outside again to make the repair last longer.
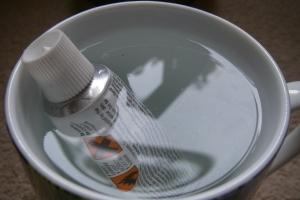
When storing urethane or silicone sealant keep it in the freezer. When you want to use it put it in a cup of hot water. When you have finished using it clean any residue from around the tube thread and opening. If you follow these simple steps you'll actually get to use all the sealant in the tube rather than end up with a tube of solid sealant.
|
|
|
|
|---|
|
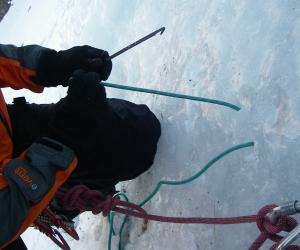
The home made abalokov threader
When heading out to do your next bit of ice climbing it is worth remembering your tat, knife and abalokov threader.
There is however a good chance you've forgotten where you threader is from last season and don't want to splash out on a new one and you have no chance of buying one anyway because it's 10 at night the day before you plan to head out.
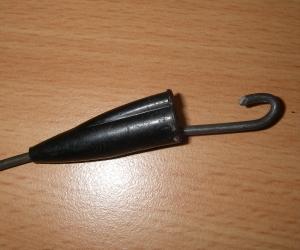
The solution to this little problem is in your wardrobe. Pull out one of those old wire coathangers and with a pair of pliers fashion your own.
Make sure it is long enough for your longest ice screw and that the loop end fits your gear crab. Be sure to 'duck tape' around the sharp end that you will be holding. At the hook end make sure the radius of the hook is fairly small and just prior to bending your hook slip a 'bic' pen lid over the end. This can then be slid over the hook to protect your rucsac and fingers when packing your rack in your sack.
|
|

|
|
|---|
|
Putting on crampons
When it is time to put on your crampons make the process as easy as possible for yourself.
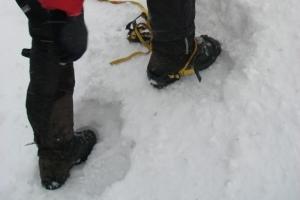
If the ground is sloping you can use this to your advantage. Cut or stamp out a ledge in the snow at shin height. It is important to prepare the ground for where you are putting the crampons by clearing away any loose snow. This will make it easier to keep the snow out of the area between the crampon and the sole of your boot.
Make the area about 1 ice axe length and width and then make another below it for you other foot. Make sure you rucsac is also on a well prepared ledge and your crampon bag is tucked away before the wind blows it away.
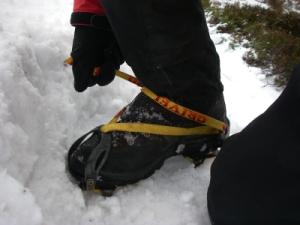
Now you are ready to put on your crampons in comfort. Facing uphill it is now very easy to reach your boots. If it's windy or you want to get closer to your boots you can also kneel down while fastening your crampons.
|
|
|
|---|

|
Tiffin Recipe
Out on the hill you need to keep up your energy levels. Here is a great recipe for Tiffin which I enjoy out on the hill especially in the winter.
You will need: 4oz (115g) Plain Chocolate, 4oz (115g) Milk Chocolate, 8oz (230g) Crushed Biscuits (I use Rich Tea), 4oz (115g) Butter, 2 tblsp Golden Syrup, 2 tblsp Sugar, 4 tsp Cocoa and a handful of Raisins.
To make it is very simple. Melt the butter, syrup, sugar and cocoa in a pan. Add the raisins and crushed biscuits. Pour into a tin or plastic box so that it is approximately 2cm thick. Melt all the chocolate and pour over the mixture in the tin. Put in the fridge to set. Cut into pieces (I find this easiest when it's not completely set)
|

|
|
|---|
|
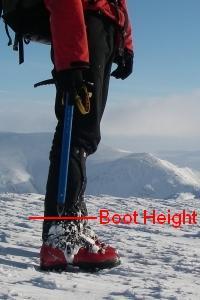
Walking Axe LengthWhen choosing a walking axe make sure it is the right one for you. Don't choose an axe because it is the same one your mate has or because it is the only one in the shop.
Shop around and get one that suits you. A top tip is that when the axe is being held correctly by the head (as shown in the photo) then the spike at the end of the shaft should just reach the top of your boot.
|
|
|---|
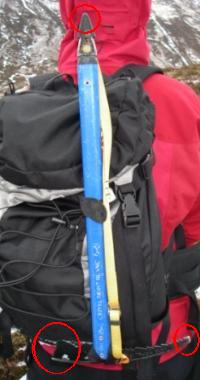
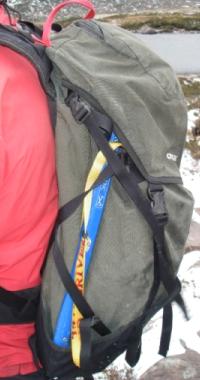
Packing a walking axe on your rucksackWhen attaching your axe to your rucksack think about how you can avoid the sharp bits sticking outwards. In the left hand image you can see how attaching an axe in this way means all the sharp bits are sticking out which is potentially dangerous to others and if you trip and take a tumble you could also stab yourself with your own axe.
In the right hand image you can see how all the sharp bits are tucked away. For this set up to work it helps to have a little pocket of material at the bottom of the side of your rucksack. Not all rucksacks have this.
|
|
|
|
|---|
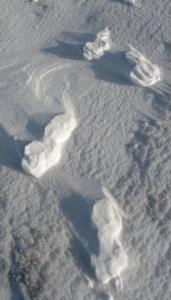
Avalanche AwarenessWhen you are out on the hill in winter you have to be continually aware of what the weather is doing and has done to affect the snow conditions. In the left hand photo here you can see 'raised footprints'. These have been formed by someone walking on soft snow and compressing it. After this the wind has blown away the uncompressed snow from around the footprints. This video of wind blown snow shows how quickly snow is moved from one side of the hill to another. Think about where this snow is going. The snow will be deposited on the lee side of a hill or obstruction. This is where 'windslab' can accumulate.
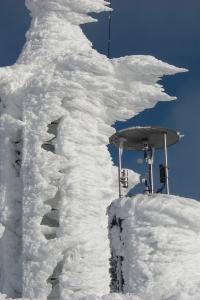
A simple indicator of past wind direction will help you to work out where the fresh snow is lying on the hill. In the right hand photo here you can see a large build up of rime ice on the weather station on top of Cairngorm. The rime ice will point in the direction the wind has been coming from, in this photo from the right.
|
 |
 |
|
|---|
|
Winter Walking
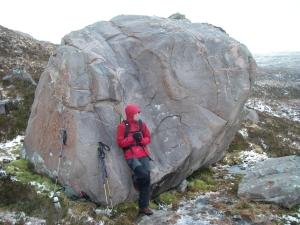
When out walking in wild weather we often use common sense and shelter behind big boulders, cliffs or ridges to avoid the cold wet weather.
However, I am regularly surprised by how many folk don't take similar precautions to stay dry when sitting down for a break.
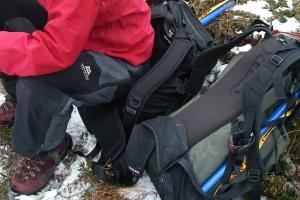
A very simple top tip is sit on your sack. It's very easy to grab your flask and butties out of your rucksack and then sit on your sack to keep your bum dry and warm. Make sure you don't sit on the section of your rucksack which has your helmet in it (they do crack if you squash them sideways).
|
|
|
|---|
|
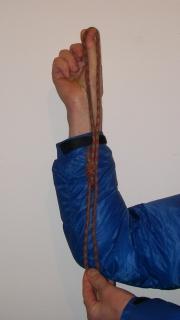
PrussicsRecently I was asked “what length should my prussic loop be?” Well, my simple rule of thumb is that the loop should be the length from your elbow to the tip of your thumb.
Using 6mm cord, start with approx 130cm of cord and tie a loop using a double fishermans knot. You can always start with a bit more and cut the ends once you have tied the knot. Make sure the ends are not shorter than 3cm long beyond the end of the knot.
|


